This is a continuation of Part 1 that I have started about how to learn basic photography on your own.
Like most beginners or enthusiast who only wants to learn photography as a hobby, learning photograhy on your own is the most economical way.
Yes, it may take some time to understand the complexity of photography. But, if you are focused on learning, you will get there eventually and should start enjoying your journey.
With that said, let’s get moving.
This time will talk about Aperture
If the shutter speed is the one controlling how much time the light hits the sensor. The aperture on the other hand is responsible for how much light passes through the lens that’s being collected by the sensor.
In simple terms, aperture controls how much light is allowed to enter the lens, by controlling how big or how small the opening of the window will be.
And as I have mentioned in a previous article, the lower the f/stop number the bigger the aperture opening. On the other hand, the bigger the f/stop number the smaller the aperture opening.
Likewise, in a previous article about how to use your mirrorless camera, I have stated that Aperture controls the depth of field (DOF). Thus, you have control of the outcome of your image whether to have a shallow or deeper DOF.
So, without further ado let’s go down to business.
Note:1. You must set your mirrorless camera to Aperture Priority to have manual control of the aperture. It's normally marked A or Av on the dial depending on the brand of your mirrorless camera. 2. Aperture is the second element that consists to have proper exposure.
Background Blur
We’re just talking about shallow depth of field. In simple terms, it’s how much blur you want with your image background.
At this point, only part of your image is in focus- that is your main subject at the front.
You can achieve this by adjusting your aperture to the lowest f/stop number. If you have a zoom lens, you must first zoom in, on your subject (focal length need to adjust) then, adjust the aperture to the lowest f/number, by pushing the dial until it reaches the end (leftmost).
Let’s bring spiderman to show us the shallow depth of field.

Tip: 1. If you're not confident of Aperture priority, you can set your mirrorless camera to Program mode then select PORTRAIT style. At this setting you could also achieved shallow depth of field.2. Set focus to single point AF (recommended).
Foreground Blur
Just like background blur, you could also create a focused image in the background using the same technique. Only this time you need to focus on the subject at the back that you want to come out clear.
Let’s call again spiderman to show us what is foreground blur looks like.

Bokeh Shot
Bokeh is another result of a shallow depth of field. Basically, bokeh adds aesthetic appeal to your image. It’s represented by the soft out-of-focus circles of lights.
To achieve bokeh, the aperture should also be set to the lowest f/number.

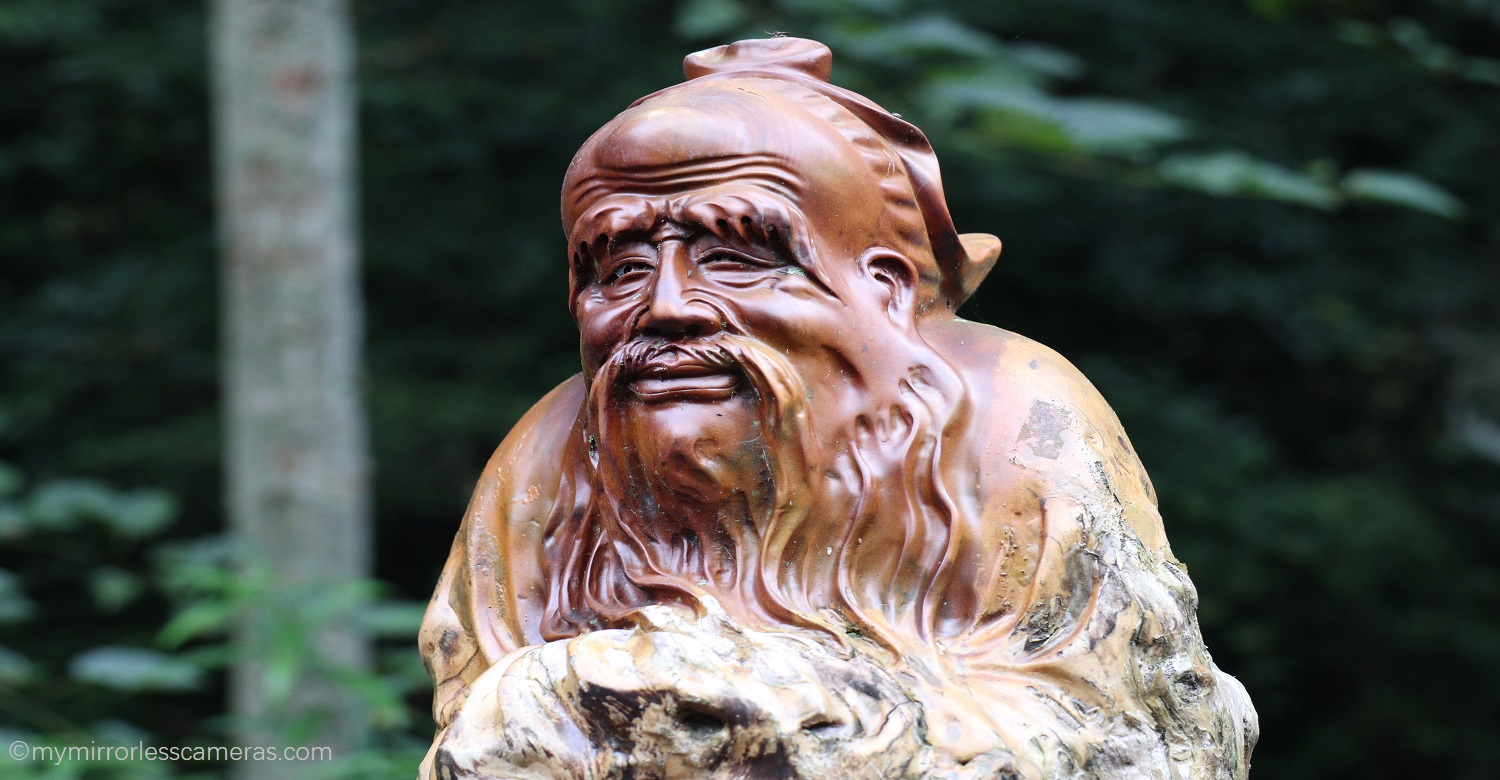
The Sweet Spot
Some photography experts call it the sweet spot aperture. f/8 to be exact is where to set your aperture if you want a deeper depth of field. It means that the whole image including the background is in focus.

Except for the leaves that were too close to my mirrorless camera the entire image is in focus, especially the background.
Shooting Landscape
Shooting landscape at aperture priority mode will have a better image result with aperture set to f/11, f/16, and f/22 respectively.
This will result in a sharp focus of your images’ foreground as well as background.

Conclusion
The settings I have mentioned here are the most common settings used at aperture priority to get your desired photograph.
Of course, you have total control over your mirrorless camera. So you can always experiment and see for yourself if there are other better ways or settings than those mentioned above.
And to learn basic photography on your own you need to do the following:
- Get familiar with your mirrorless camera (I have discussed previously the importance of knowing your mirrorless camera).
- Practice makes perfect- so practice, practice, and always practice.
- Watch free video tutorials to improve your skills.
- Read books or articles about photography.
- Join photography groups to get valuable insights from the experts.
- Don’t get mad or get disappointed when someone critiques your photographs instead, accept them, learn, and improve.
There you have it, folks, once again thank you for reading. If you find this article helpful or you have some questions or suggestions please leave a comment below. I will try to answer them to the best of my knowledge.