In my previous articles, I have mentioned the importance of a tripod as an essential accessory. Today, I will be walking you through how to use a camera tripod.
As a beginner, you need to ensure how to use your tripod accordingly to avoid any adverse predicament to your mirrorless camera.
The worst thing you can think about is to find your mirrorless camera stumbling on the ground after mounting it to your tripod because of some silly mistakes.
So join me as we explore how to avoid any incident and how to make use of your camera tripod properly.
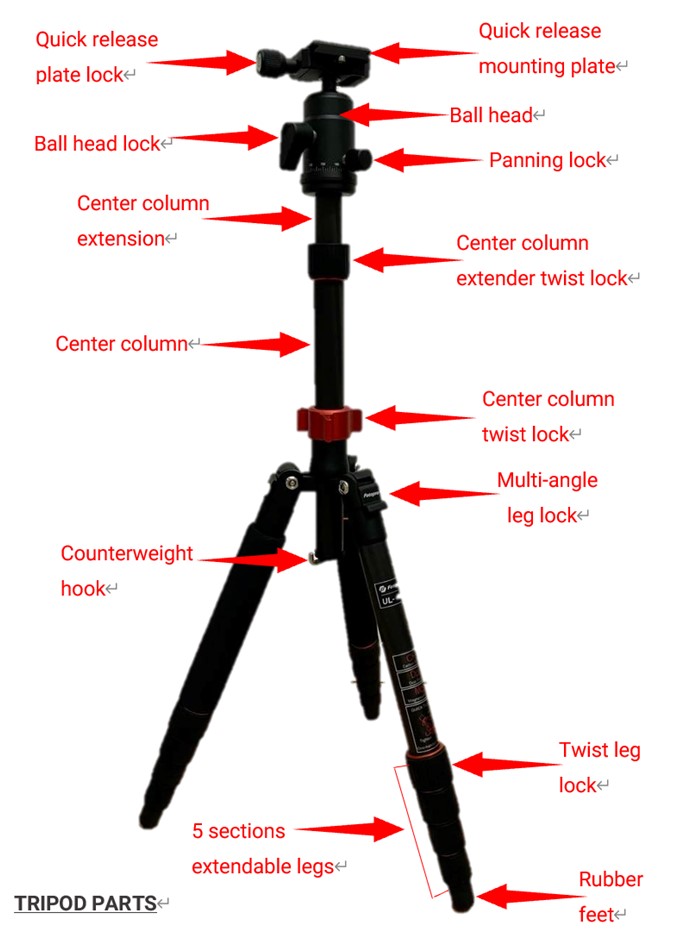
What are the Parts of a Tripod
Before we proceed, let us first identify what are the parts of a tripod. And depending on the type of tripod that you have purchased there could be some slight difference in the name of its parts.
It is also important to note that there are still those old types of tripods with fixed mounting plates and some tripods are using the quick snap leg locks.
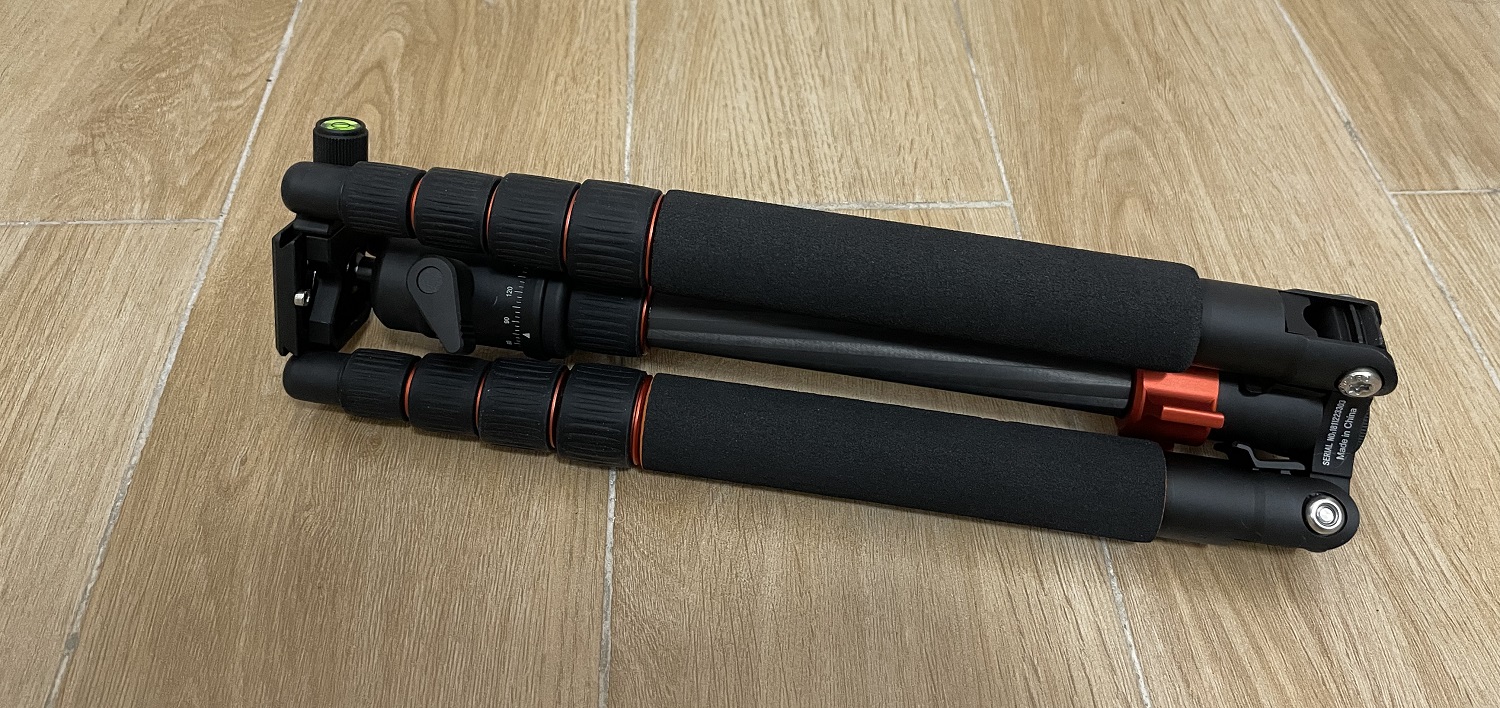
For our below example, this is my tripod with ball head and 5 leg sections with twist-type leg locks. It’s carbon fiber and weighs 2.17lbs with a maximum load capacity of 8kg. It has three angles (high, mid, low) and can be folded 180o in reverse to maximize storage. The counterweight hook can also be unscrewed to realize an inverted shooting setup.
Knowing the parts of your tripod will be beneficial, just as important as knowing your mirrorless camera.
As I have discussed in my previous article about Best Tripods for Mirrorless Cameras that when buying a tripod you must consider the maximum load. Make sure that your tripod must be able to support your mirrorless camera, else you are asking for trouble and could damage your expensive gear.
How does Tripod work?
We already have identified the parts of the tripod, so we will now define each part to know how it works and or functions.
This is especially important for beginners to know how each of the tripod’s parts functions, as it will be critical in your tripod setup.
Let’s start from the bottom…
1. Rubber feet
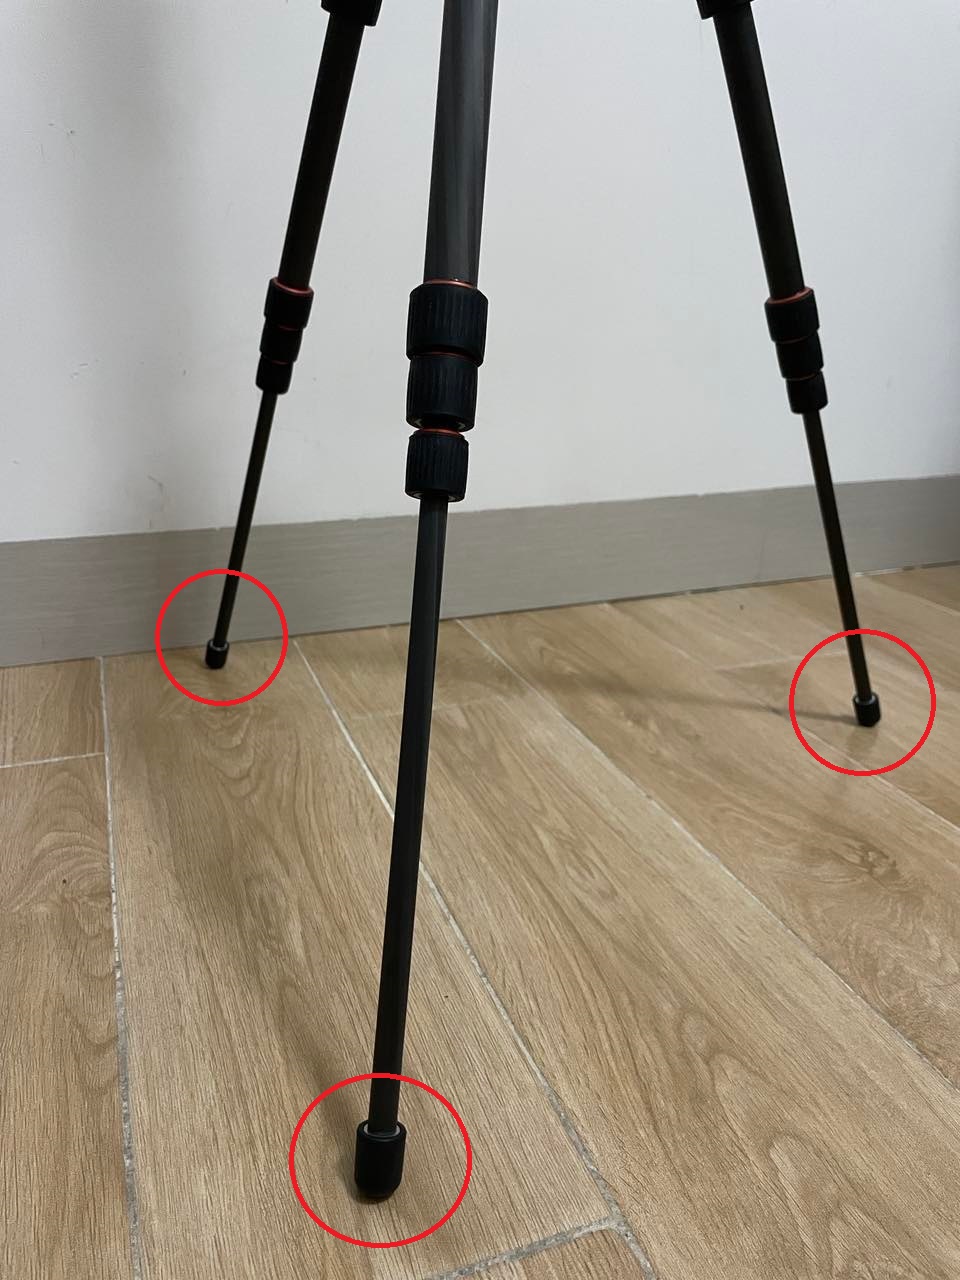
Anti-slip rubber feet ensure that the tripod does not skid especially if it is set up on a slippery type of surface.
The rubber feet also protect the tip of the metal tube from getting damaged and keep the tripod level.
2. Extendable legs
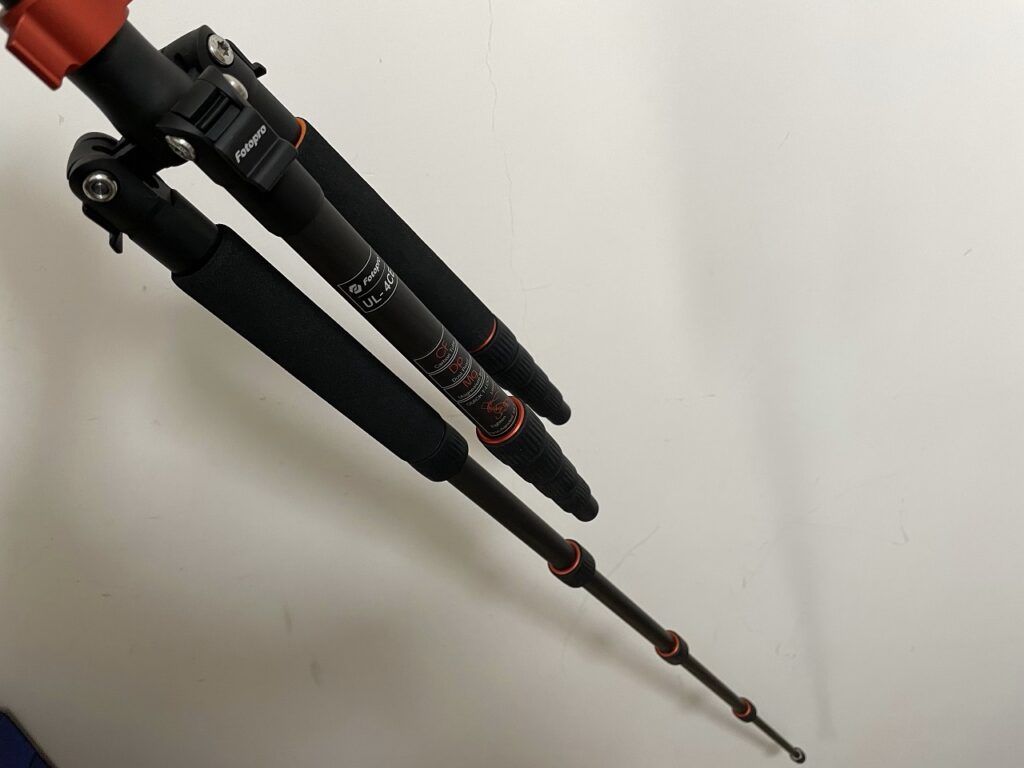
Tripod legs can be extended and in this example, the tripod has 5 sections. When extending the legs always start at the biggest tube down to the smallest tube.
3. Twist leg locks
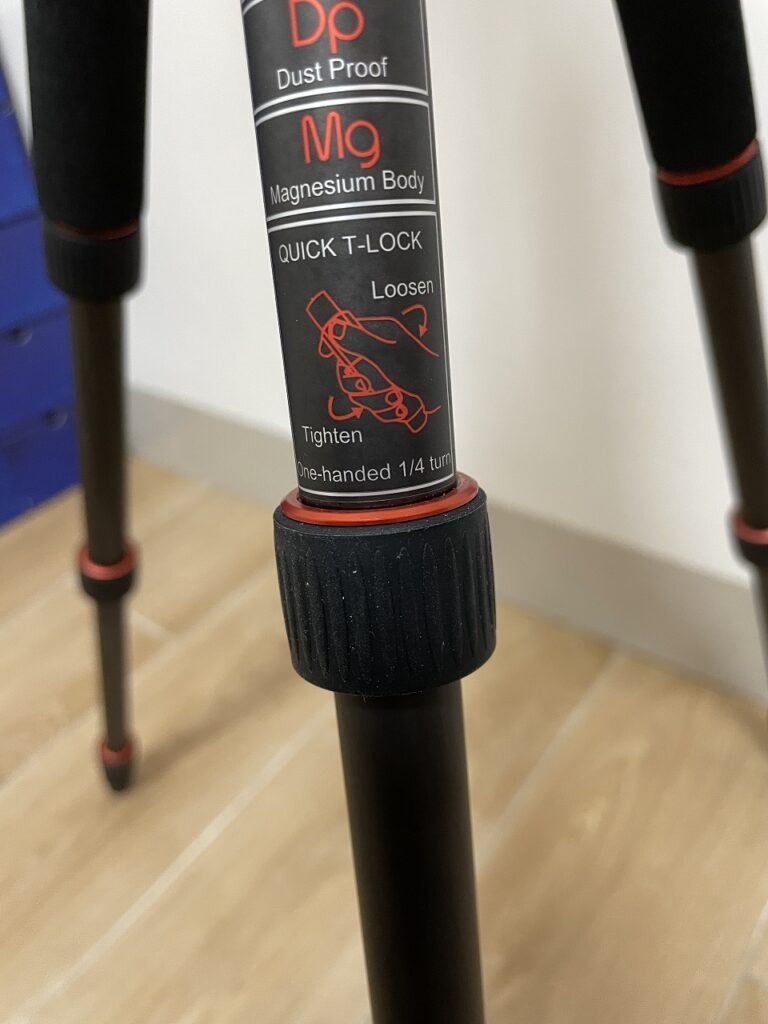
Tripod leg locks must be tightened properly after extending each leg section. This is to ensure that after mounting your camera it will not retract. Which can cause it to fall over and damage your mirrorless camera.
There are two types of leg locks- the twist type as shown here in this sample and another is the quick snap or some called it the flip locks (you may check this youtube video)
4. Multi-angle leg lock/latch
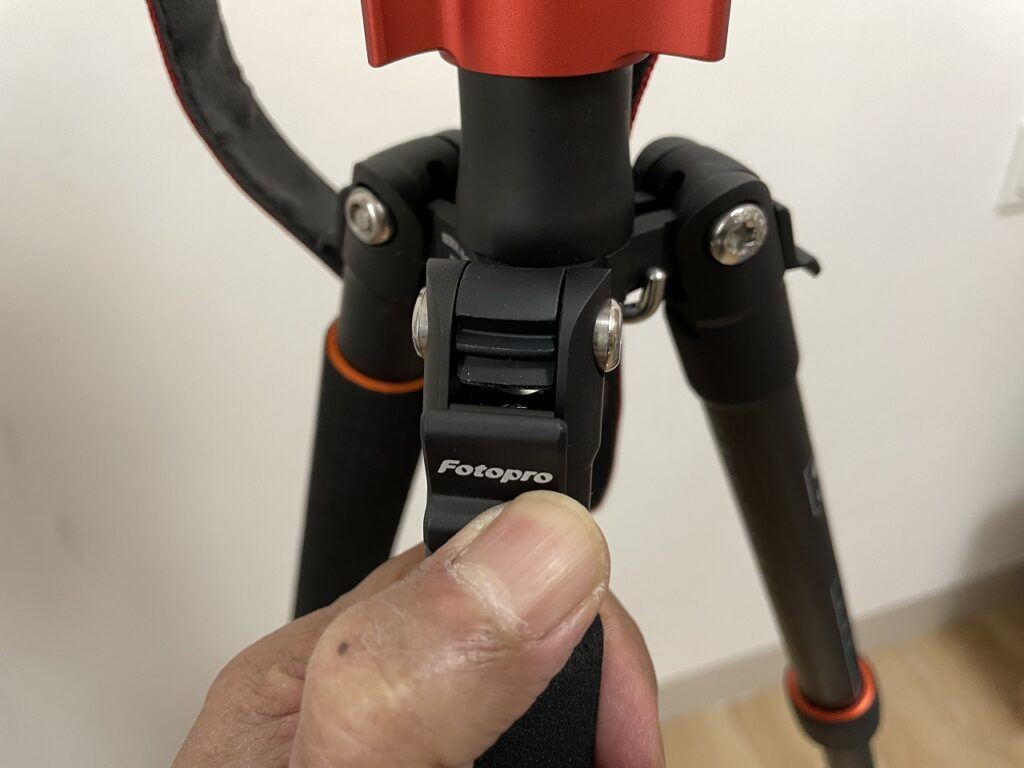
Multi-angle leg lock or latch must be properly adjusted to level your tripod. A tripod with a multi-angle leg latch can be used in macro photography as you can set the tripod lower and at different angles which is necessary for macro photography to have a different position setup.
After completely extending and locking the tripod legs, let’s go back at the top to show the sequence of setting up your mirrorless camera in your tripod. But please note this is based on a ball head type of tripod with a quick release plate.
5. Quick release mounting plate
The quick-release mounting plate is where you’re going to attach your mirrorless camera. First step, loosen the quick release plate lock to unmount the quick release mounting plate and attach it to your mirrorless camera.
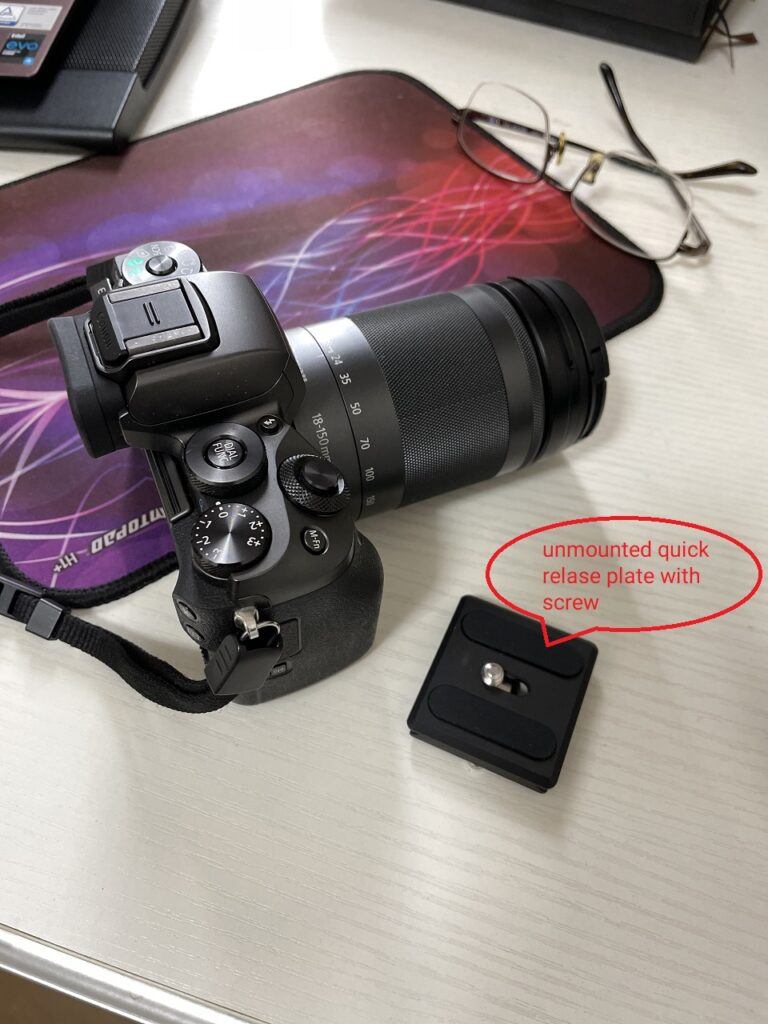
The unmounted quick-release mounting plate that you are going to attach to your mirrorless camera.
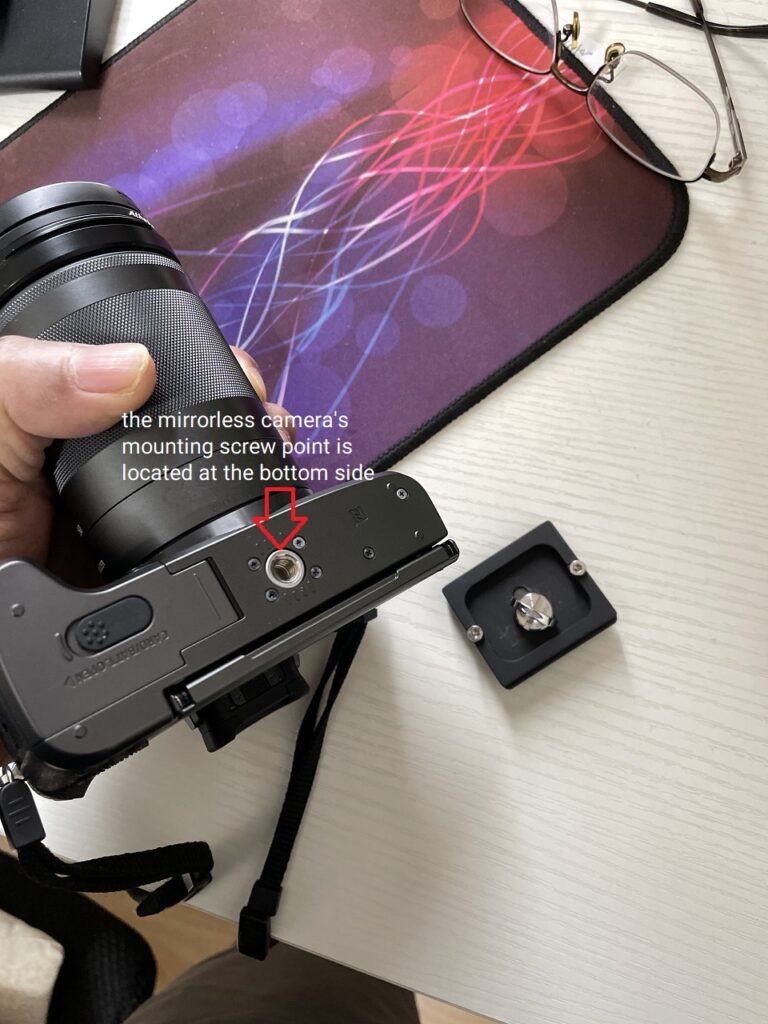
Locate the mounting screw point at the bottom side of your mirrorless camera.
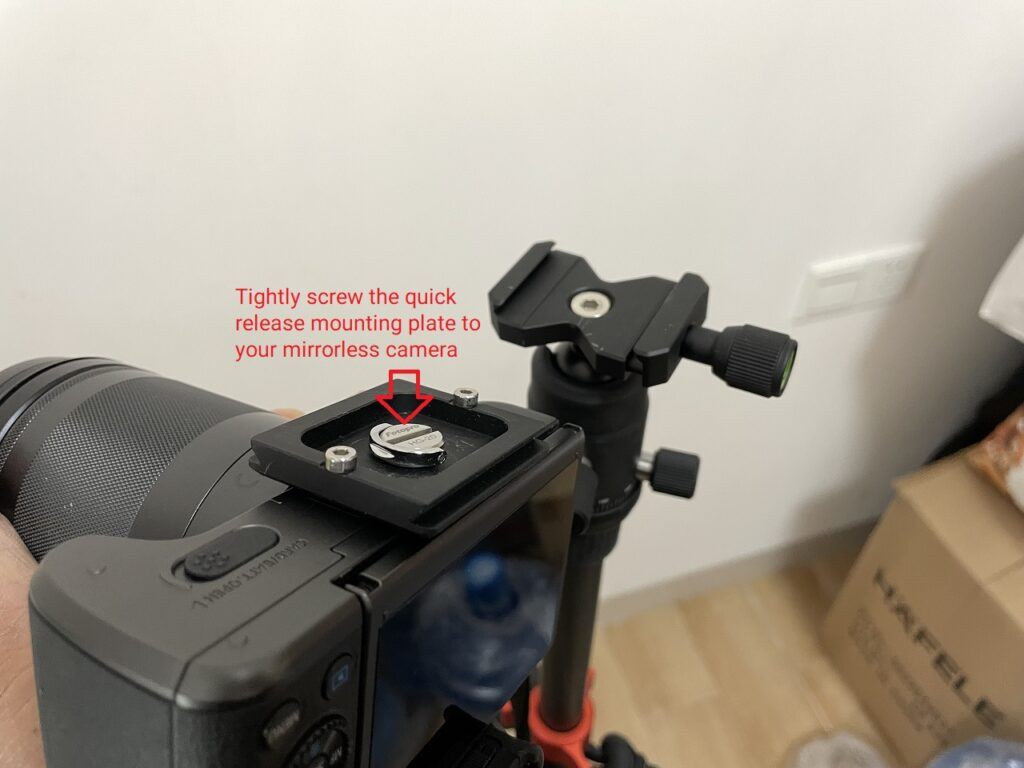
Ensure that the quick-release mounting plate is securely and tightly mounted to your mirrorless camera.
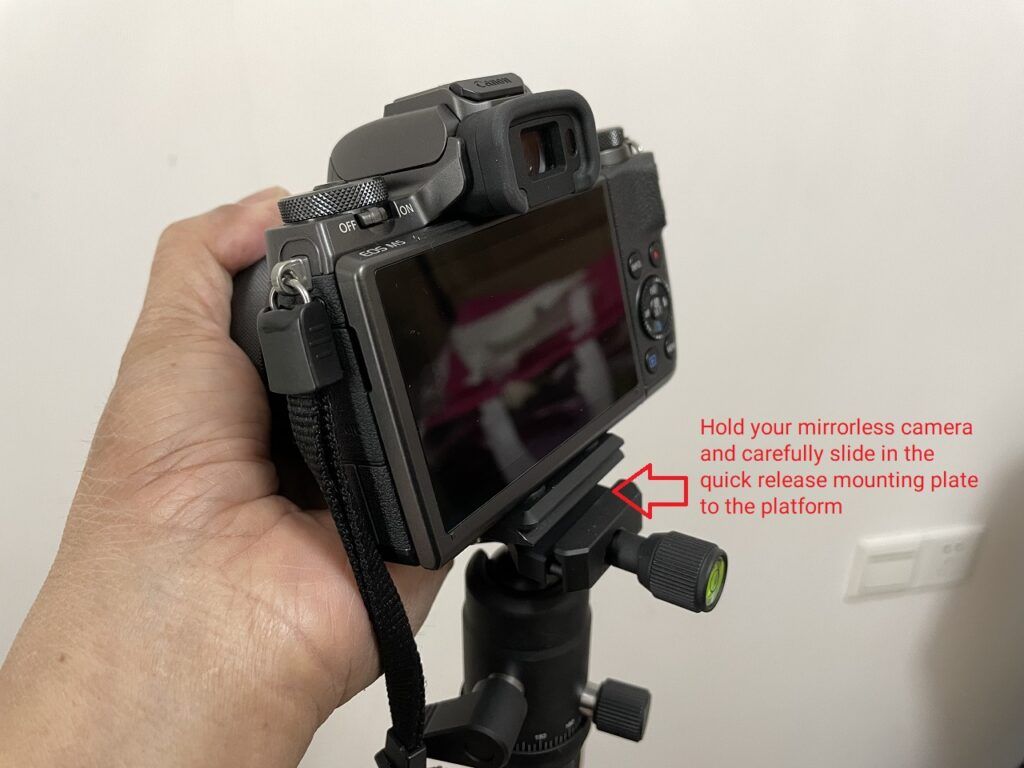
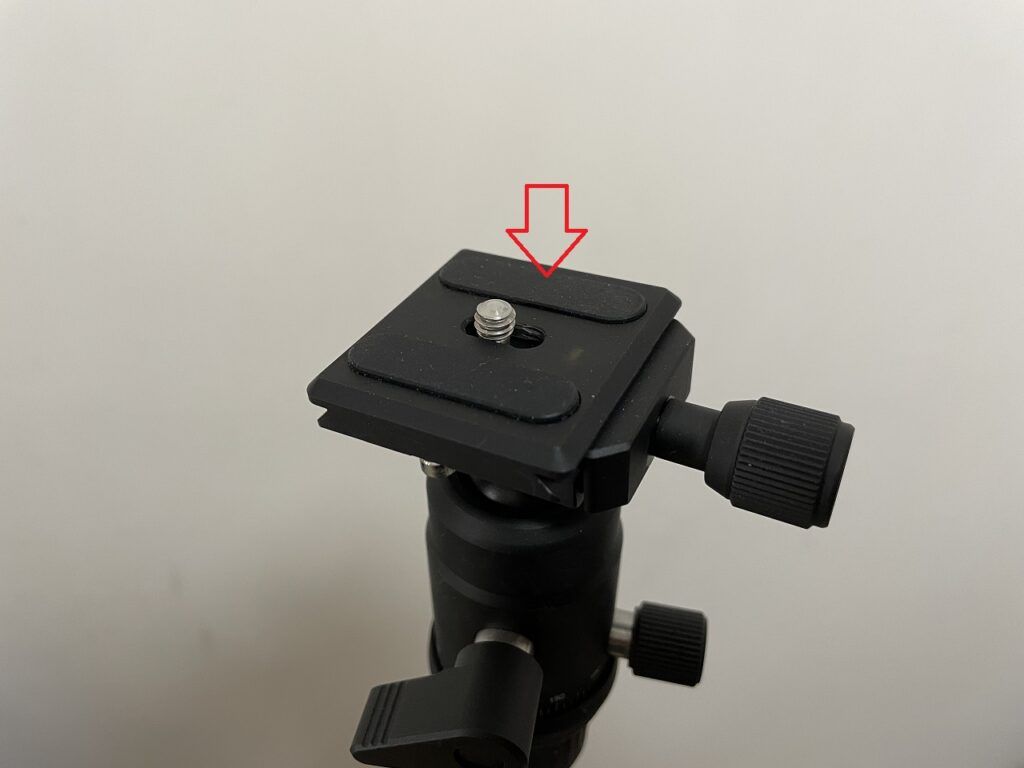
When mounting your mirrorless camera to the platform make sure you do it correctly. Take note the groove on the quick plate must catch and lock with the platform.
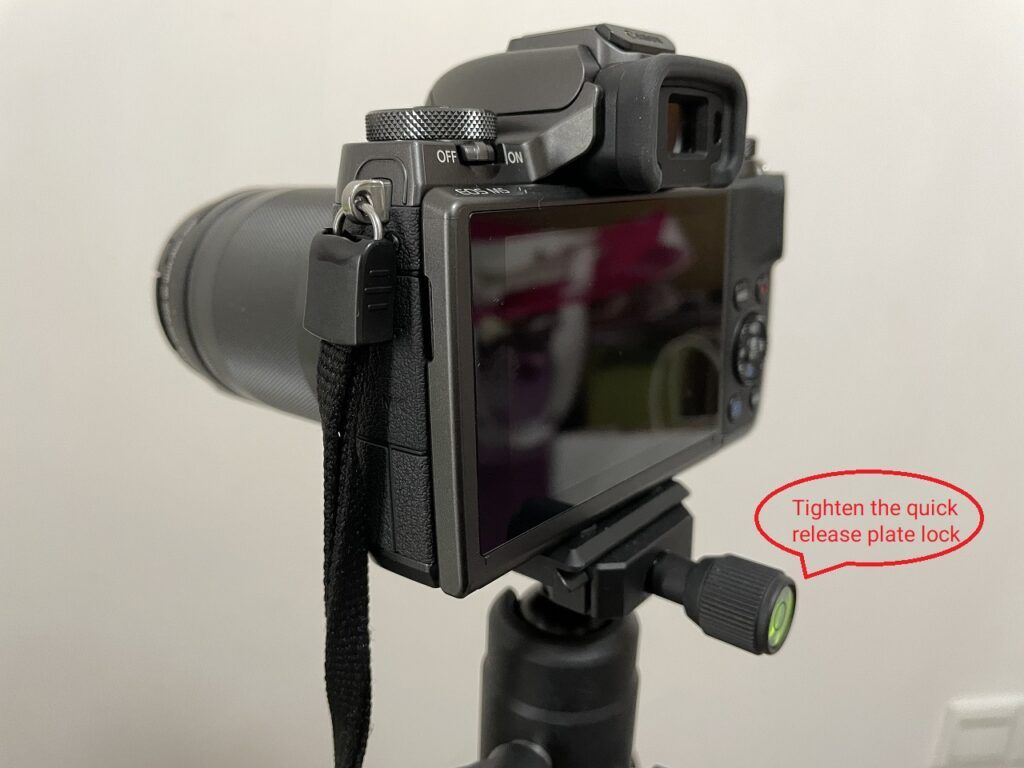
After confirming that the quick release was inserted correctly, make sure to tighten the quick release plate lock.
Note that some design employs the quick-release snap lock, the same way make sure it is tightly locked.
At this point, you have successfully and securely mounted your mirrorless camera into your tripod. Now let’s take a look at the other parts of the tripod.
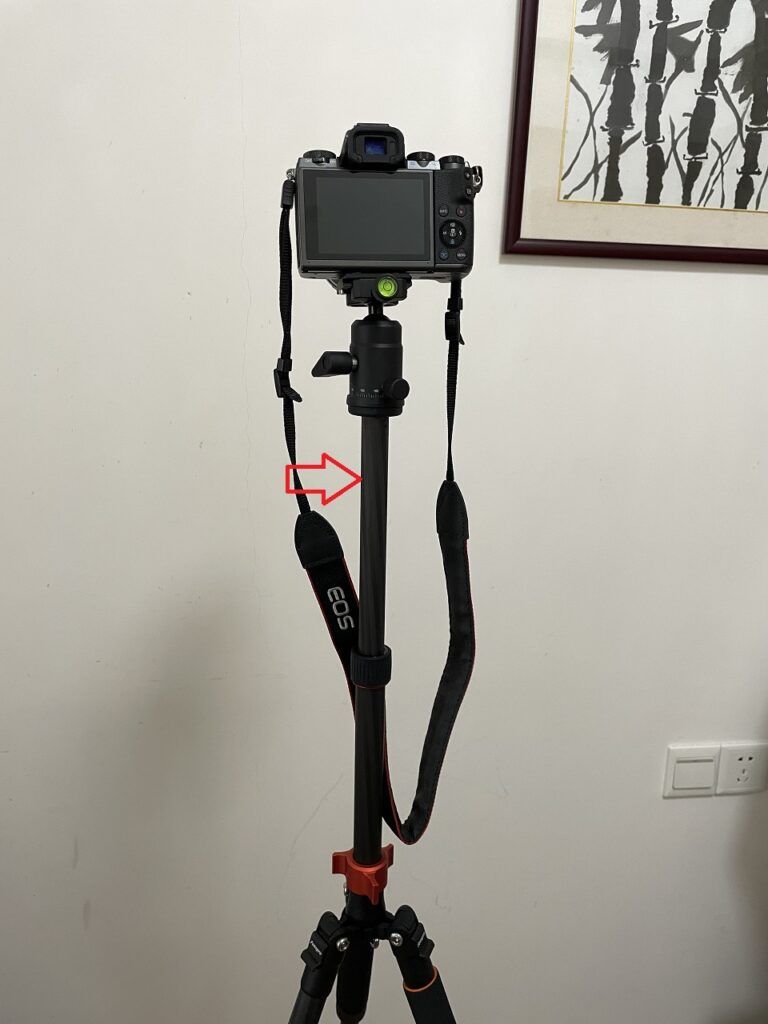
6. Center column
The center column can be adjusted to determine the desired height needed for your shooting setup.
First, loosen the center column lock and adjust the height. You can make it higher or lower depending on your need.
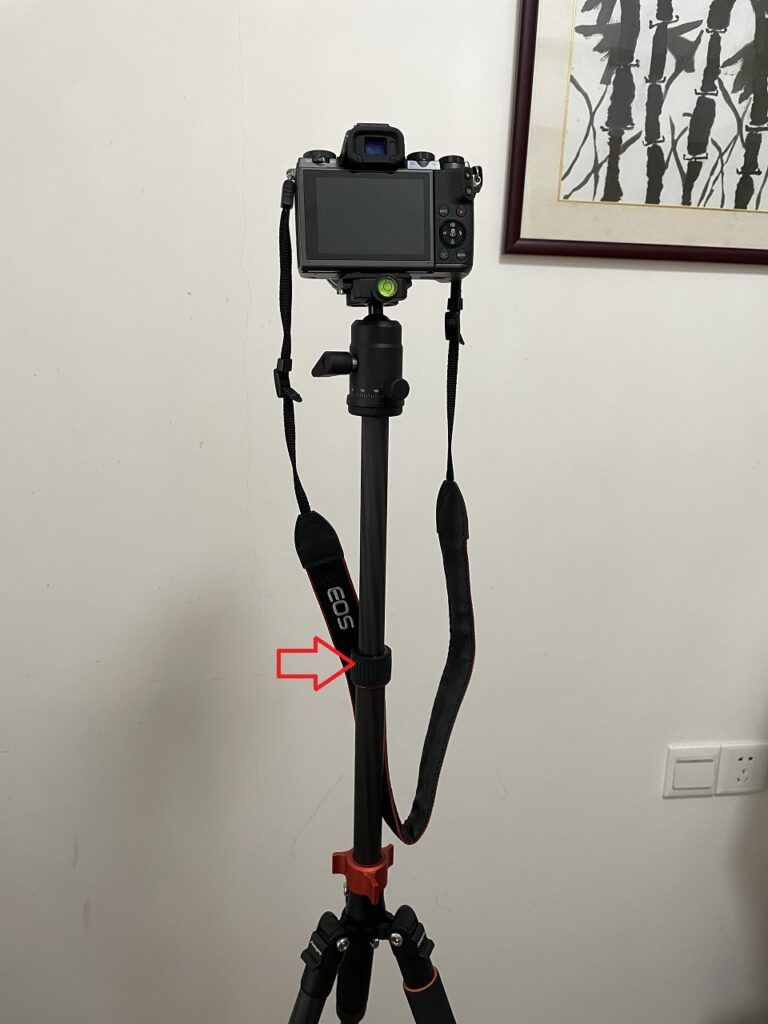
7. Center column twist lock
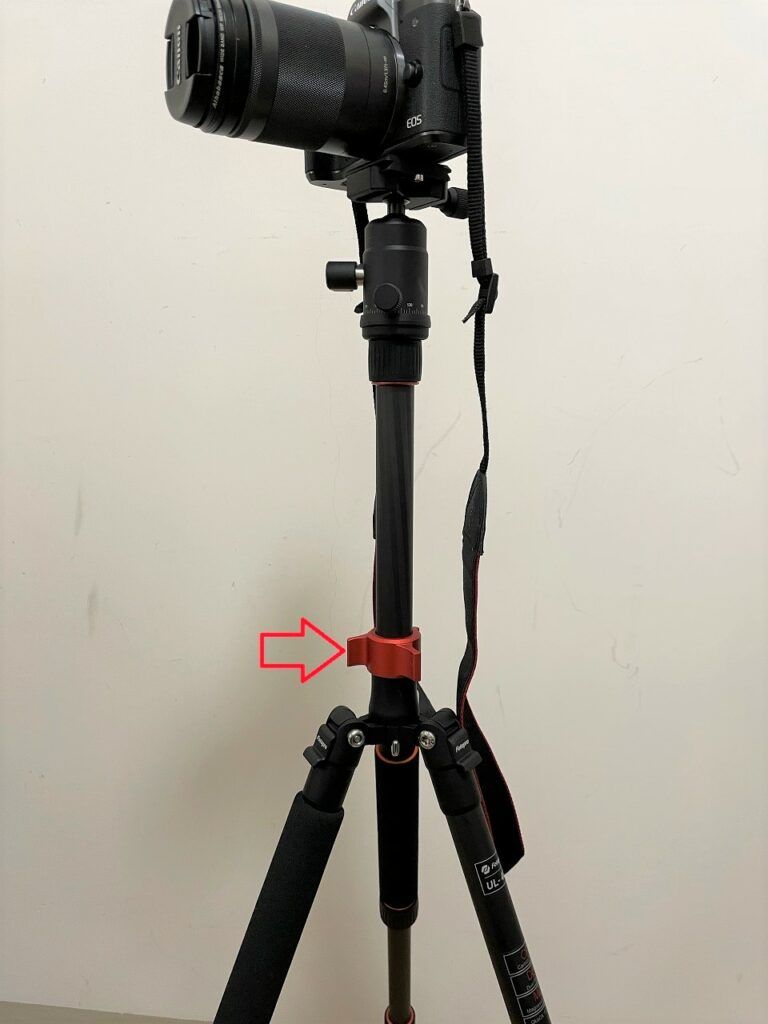
After extending the legs, the center column twist lock is responsible for adjusting and securing the possible height needed for your shooting setup.
After determining your desired shooting height, make sure to lock the center column tightly.
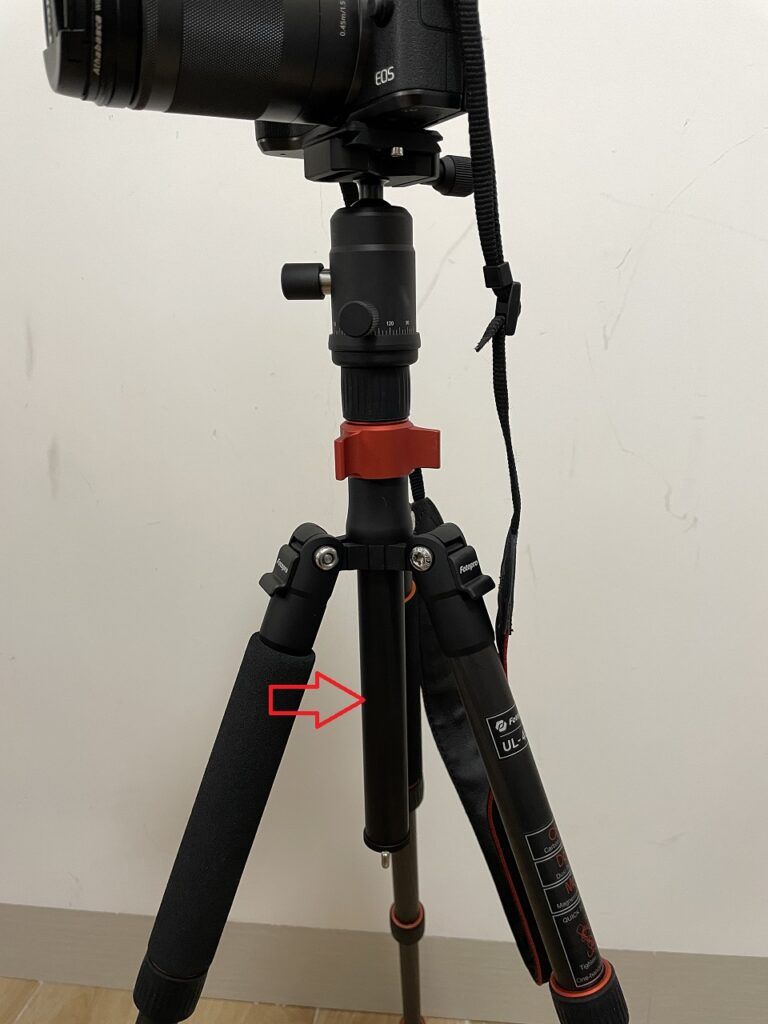
8. Center column extension
After extending the legs and raising the center column and if you think that the height is still not enough then adjust the center column extension (only if this function is available, some models might not include extension).
After determining your desired shooting height, then make sure to secure the center column extender and lock it tightly.
9. Center column extension twist lock
After adjusting the center column extension and you have determined the desired height that you want. Make sure to tighten the center column twist-lock tightly.
10. Panning lock
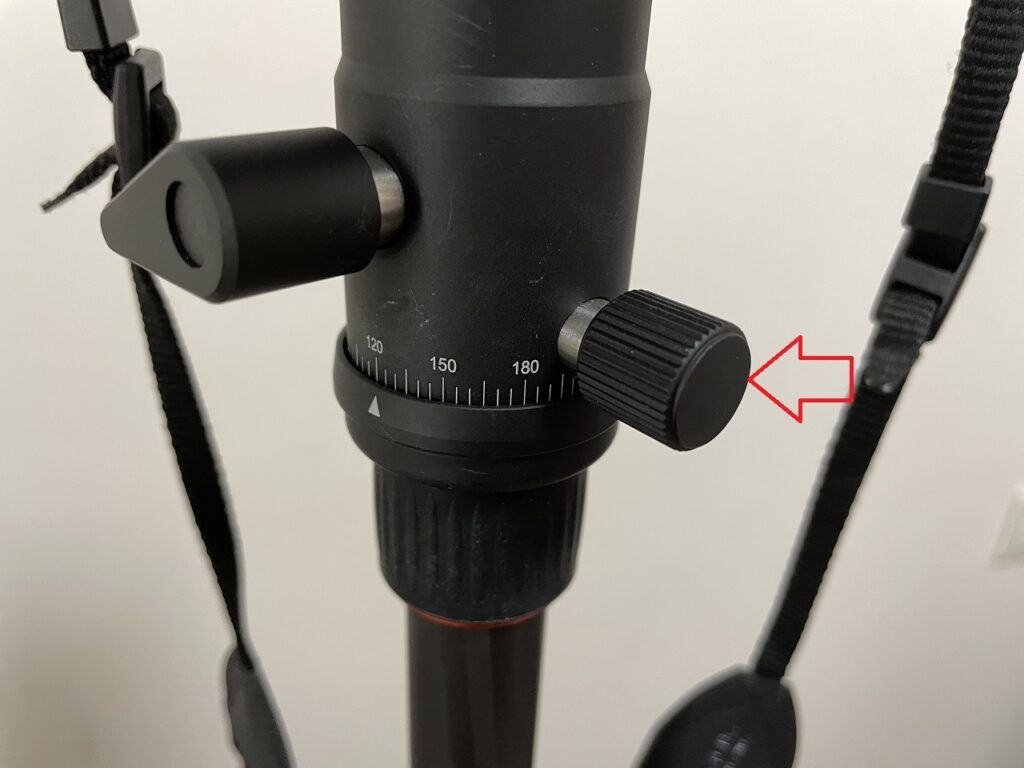
Loosen the Panning or base locking knob to rotate freely when shooting panorama or during video recording.
Tighten the Panning or base locking knob to fix in one shooting position alone.
11. Ball head lock
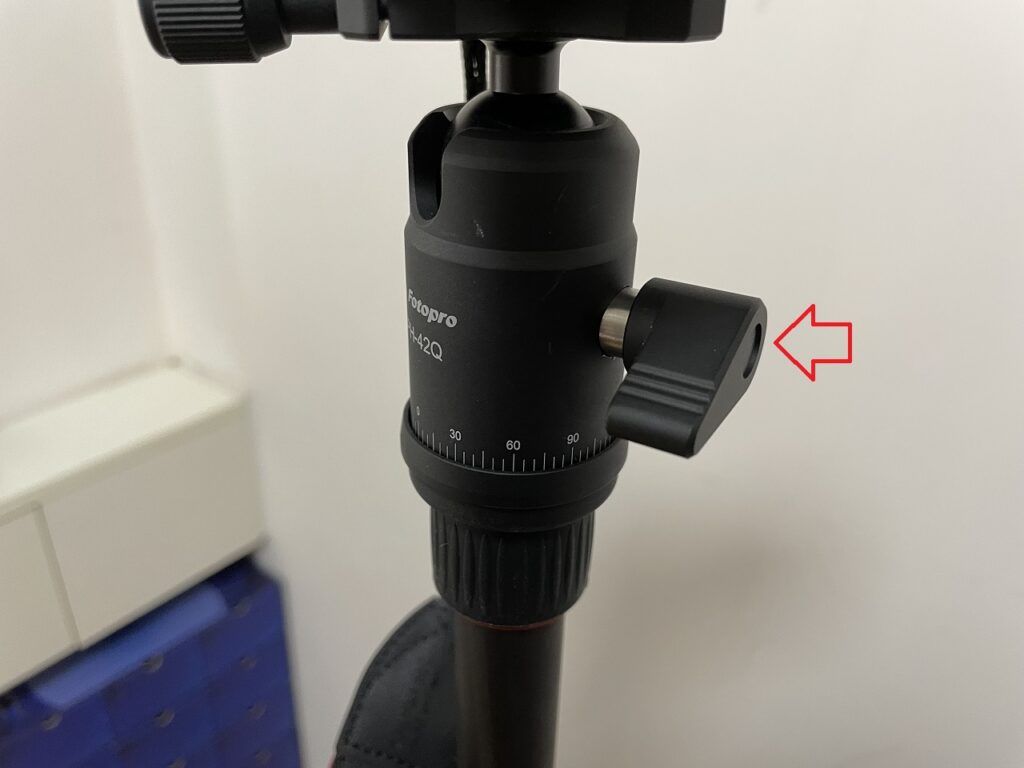
Loosen the ball head lock knob to adjust your desired shooting position. Secure and lock tightly to ensure your mirrorless camera is in an upright position. Some models have the spirit or bubble level to assist you in leveling.
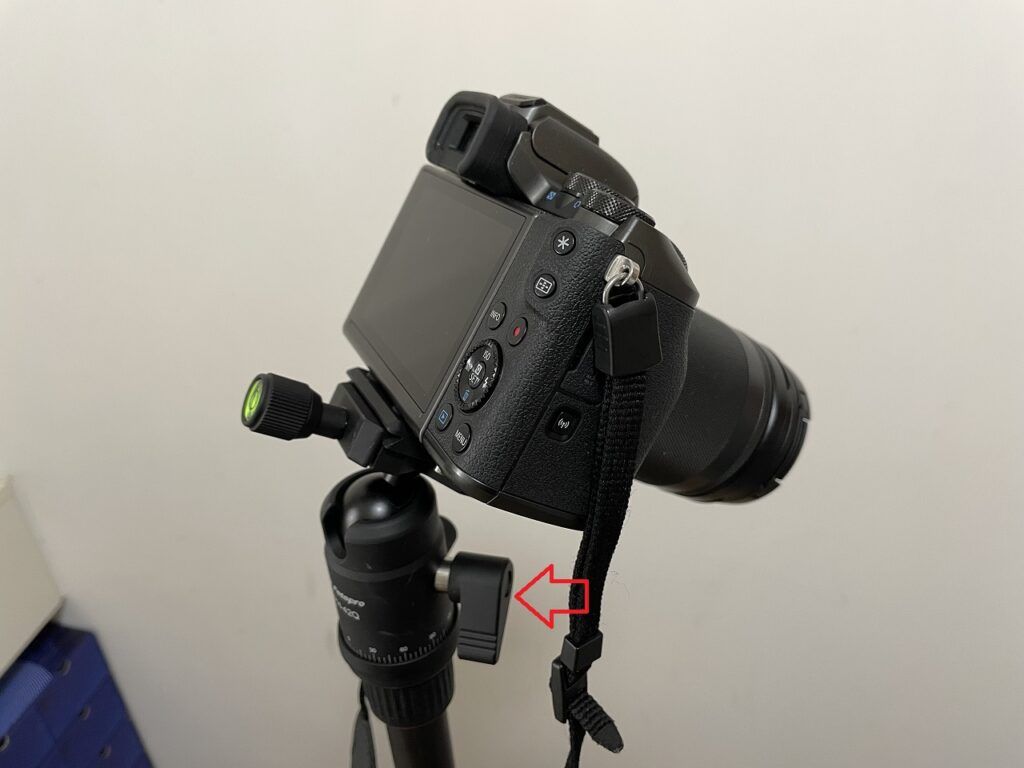
Loosen the ball head lock knob to adjust your desired shooting position (i.e. angled shooting). Lock tightly to ensure your mirrorless camera is secured.
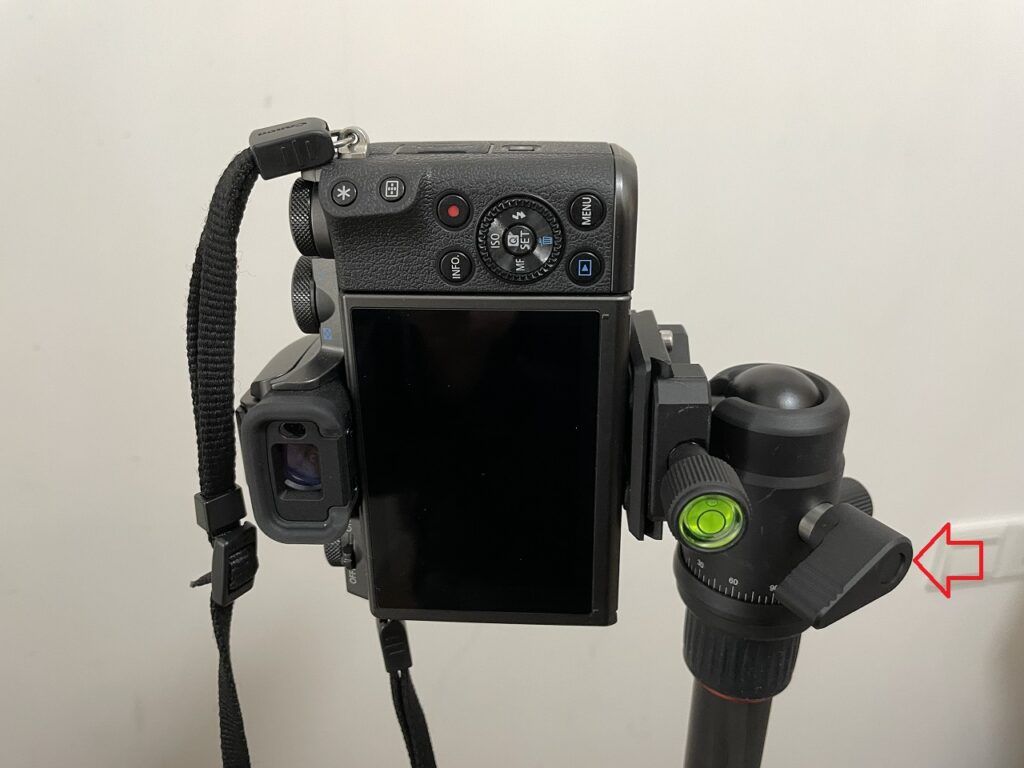
Loosen the ball head lock knob to adjust your desired shooting position (i.e. vertical shooting). Lock tightly to ensure your mirrorless camera is secured.
12. Counterweight hook
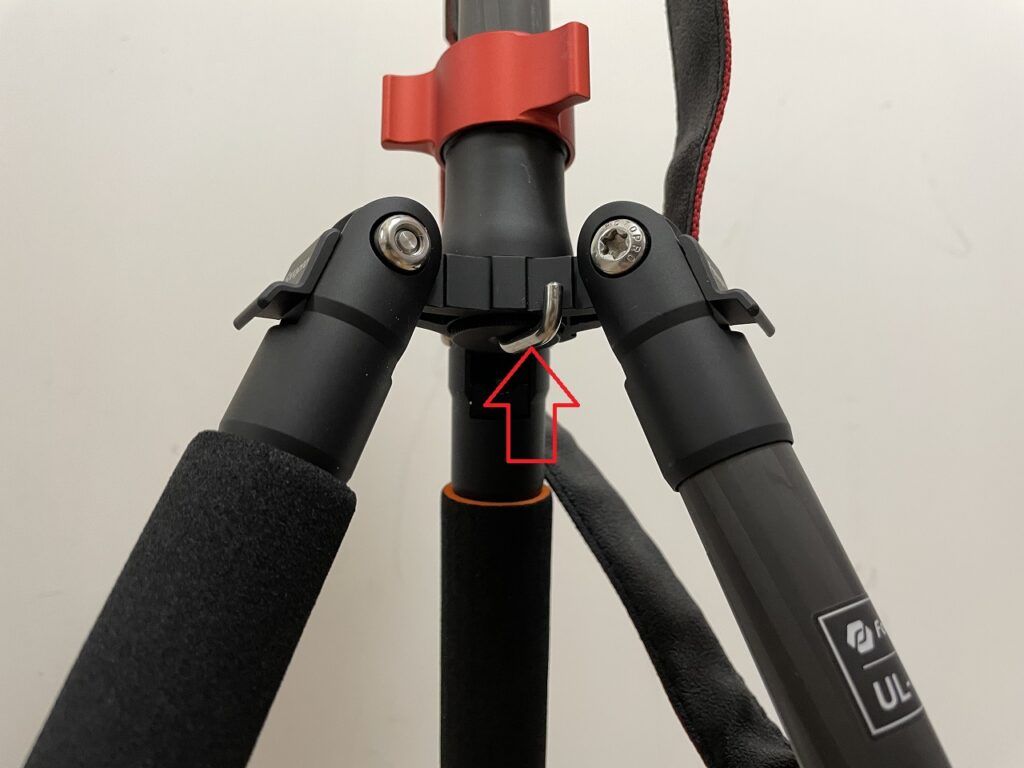
A counterweight hook is very useful, especially for lighter tripods. It enables you to add a counterweight such as a camera backpack to stabilize your tripod.
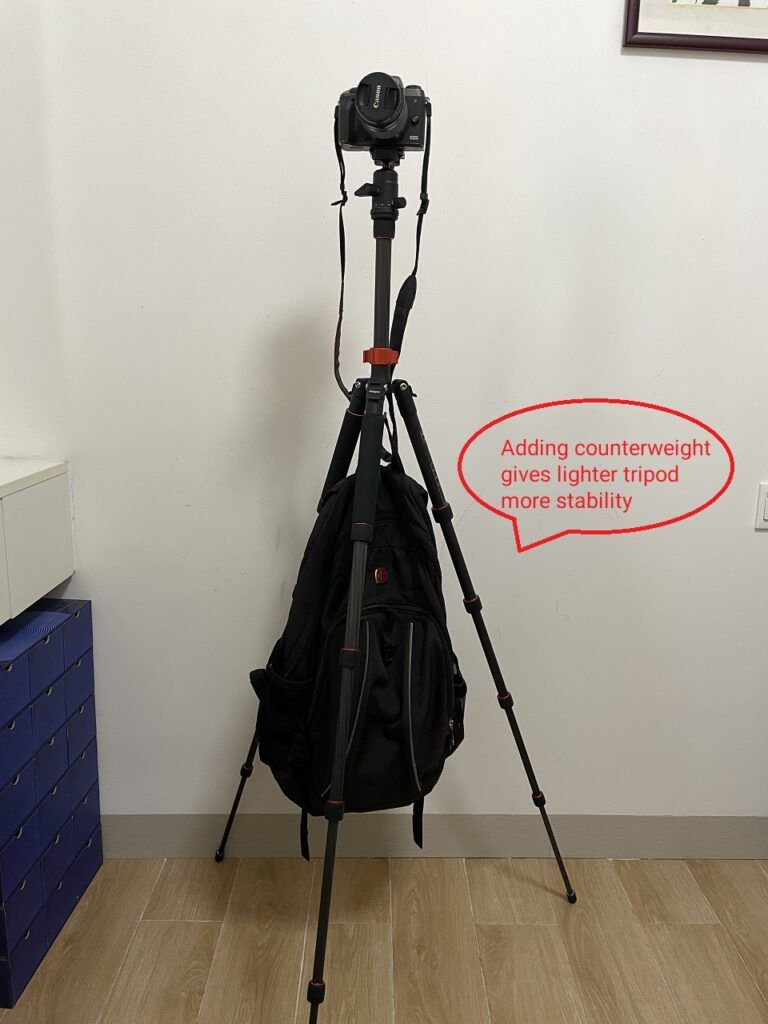
Using the counterweight hook you can add a counterweight to make your tripod more stable.
This is especially useful for lighter tripods, but just make sure that your tripod can withstand the additional weight.
Note: When your mirrorless camera is mounted on the tripod, you may have to disable the IBIS in your mirrorless camera or on the lens when shooting with a tripod. As it may give a wrong signal and, instead of having a sharp image you get the opposite blurry photographs.
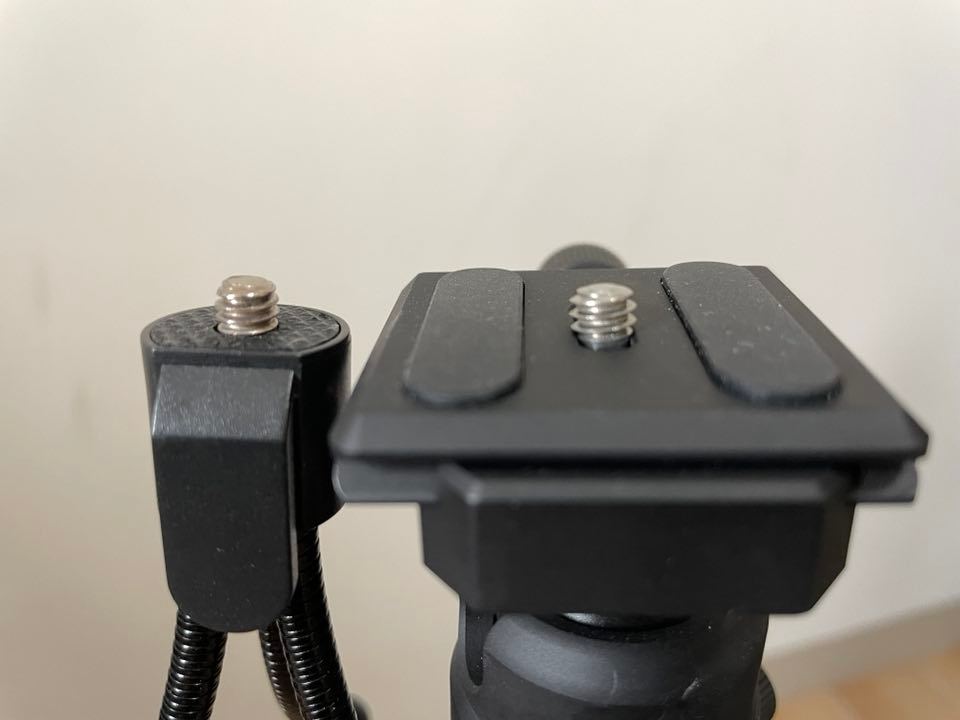
Do all tripods fit all cameras?
Almost all newer tripods have universal screw sizes that can adapt to any mirrorless camera.
At this point where most designs by manufacturers’ are aligned to save cost, thus having a common size screw that fits all is the best solution.
You can see from the below example, two different tripods that I can mount my Canon M5 mirrorless camera.
How do you secure a tripod?
As I have shown above on how a tripod works, you need to ensure that the tripod is properly set up.
- Tripod legs are extended and tightly locked
- You must position your tripod on a solid and flat ground
- Set your mirrorless camera with its lens pointing or aligned with the tripod’s one leg
- Add counterweight if necessary (this is especially beneficial for lighter tripods)
- Mirrorless camera has been securely mounted the quick release plate and tightly locked on platform
- Ball head lock has been tightened to ensure camera don’t fall over
- Center column as well as the extension column has been locked tightly
Conclusion
By now you should already have an idea of how to use a camera tripod!
We were able to establish and have defined its parts and how it works or functions. It is important to know everything about your tripod since it gives you more control over it and will prevent you from making mistakes.
So there you have it, folks, once again thank you for reading. If you find this article helpful or you have some questions or suggestions, please leave a comment. I will try to answer them to the best of my knowledge.
About Rowe Medialdea:
Hi, I’m Rowe, a mirrorless camera and photography enthusiast. We have created this site to be of help (especially to beginners) by producing easy-to-understand content about mirrorless cameras! Welcome to our website!